
The kitchen is the hub of many, if not most, family homes. One or more parents will spend hours in there preparing, serving, and tidying up after three meals a day. And anyone with kids will know that wherever mom or dad is, thay’s where they need to be as well. Your little one may be a bit too young to make a cup of tea or throw an omelette together, but they still want to be a part of what’s going on. But that can be difficult to achieve when they’re two feet tall and mom and dad need their hands for, you know, actually doing stuff!
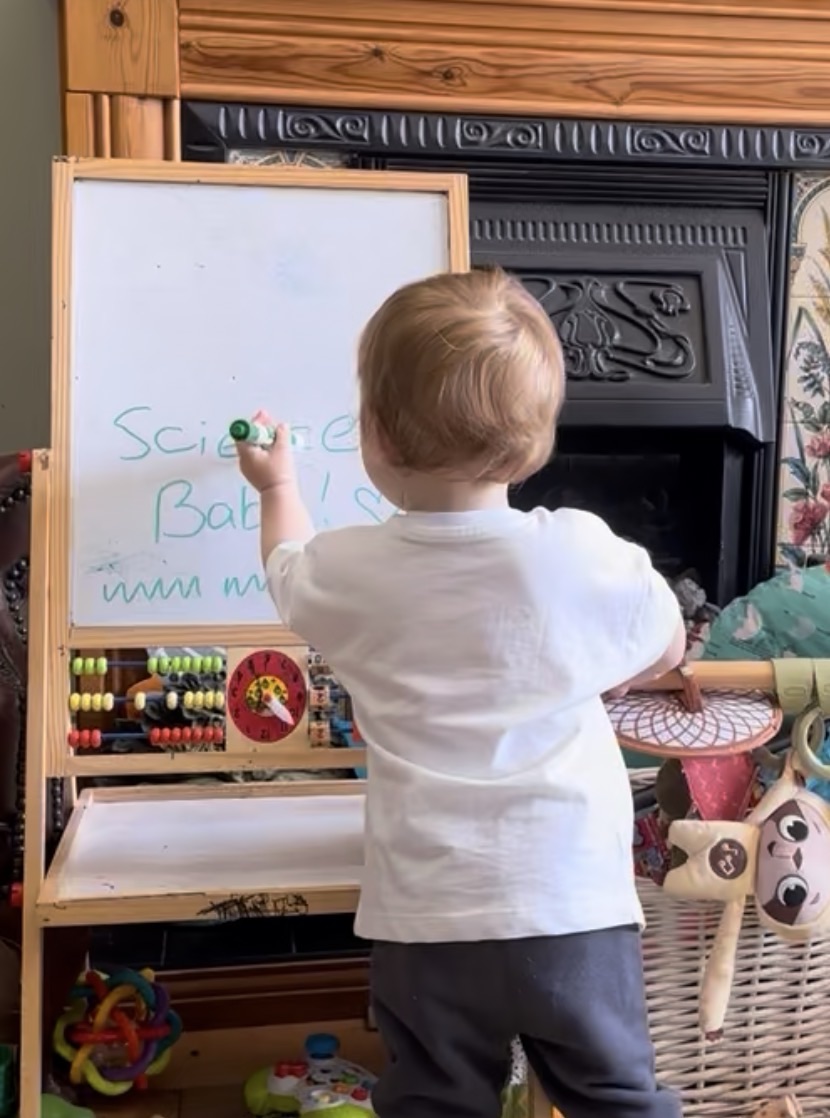
Enter the toddler tower, otherwise known as a learning tower, an activity tower, or kitchen helper tower. Tower is a little melodramatic, but as these names suggest, they consist of a raised platform that’s specifically designed to raise your toddler up to kitchen worksurface height. We DIYed ours when Science Baby was just starting to stand and cruise, and we never looked back! Now, I want to help you to do the same.
Benefits of a toddler tower
Back in the 19th century, the Italian doctor Maria Montessori developed a educational scheme for young children that prioritised hands-on learning and real-world skills. Today, many ‘Montessori’ tools and techniques aim to involve children in practical and everyday activities, to help foster independence and cater to their natural curiosity. And there’s no better starting point for this kind of development than a toddler tower in the kitchen…
A learning or toddler tower:
- Puts them on the same level as adults, allowing them to see and mimic their daily activities.
- Gives them access to sinks and worksurfaces, giving them the opportunity to participate in daily tasks such as preparing food, and washing hands and dishes
- Gives them independence to choose where they want to be within the family hub
- Provides another potential location for meals and snacks, especially in busy families who don’t always sit together at the table, or eat on the go.
Types of toddler tower
*some the links below are affiliate links which earn me a tiny amount of commission.*
There are literally hundreds of different types of toddler tower out there, so suit every space, style, and need. You may be wondering what is the best toddler tower?
Some of the things that you should consider when deciding on a toddler tower include:
- How old is your child? How tall are they? (remember they will grow!)
- What is their mobility like? How easy will they find it to climb and stand?
- Do they have any additional needs? Will they need any extra security while on the tower?
- How much space do you have? Will you need the tower to fold away when not in use?
- What is your budget?
Since I’m just a mum, and not a professional product tester with an infinite amount of time, space, and money, I haven’t gone out and bought every one, but (being me) I have put in a lot of research, to make sure the one I ended up with was going to be the right fit for our family. So I think it’s only fair that I share my research with you. These are the towers that I drooled over while Science Baby was still bum shuffling his way around the kitchen floor.
Best Multi-Purpose Toddler Tower

When you’re bringing a toddler tower into your home, why stop there. Some towers convert into easels, some into tables, some have slides. This one has it all! A 7-in-1 learning and play tower table combo that will grow and change along with your child.
Pros – Sturdy construction, convertible, chic design, choose with or without add-ons
Cons – Doesn’t fold, bulky, doesn’t adjust to different ages, expensive
Best Folding Toddler Tower

If you’re short on space, or if you just don’t want your kitchen to be dominated by a big piece of furniture and an interfering toddler, then a folding tower is a great solution.
Pros – Simple slimline design, three adjustable heights
Cons – less secure when standing
Best Budget Toddler Tower

Most of the toddler towers that are out there will set you back more than £50, which let’s be honest seems like a lot for a glorified stool. But if you want something that won’t break the bank, prepare to make some compromises (or follow my guide for a cheap and easy DIY version!)
Pros – inexpensive, non-slip steps, solid construction
Cons – limited safety for toddlers, doesn’t fold, doesn’t adjust height, bulky
Best Simple Toddler Tower
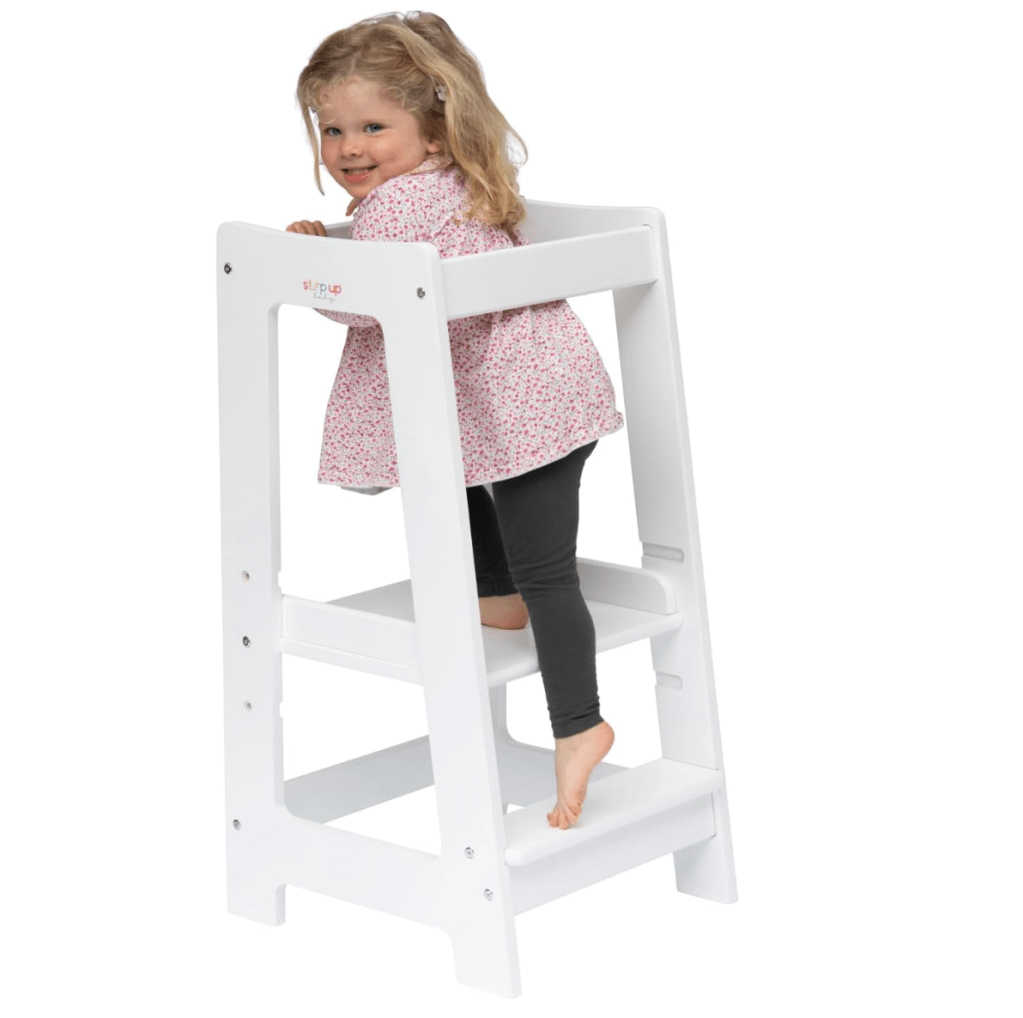
It’s easy to overthink this whole toddler tower thing. But getting back to basics, you just want a stepped stool and a bit of a safety barrier. This is probably the simplest, most minimalist toddler tower on the market.
Pros – no frills design, adjustable height, sturdy
Cons – doesn’t fold
Best-Looking Todder Tower
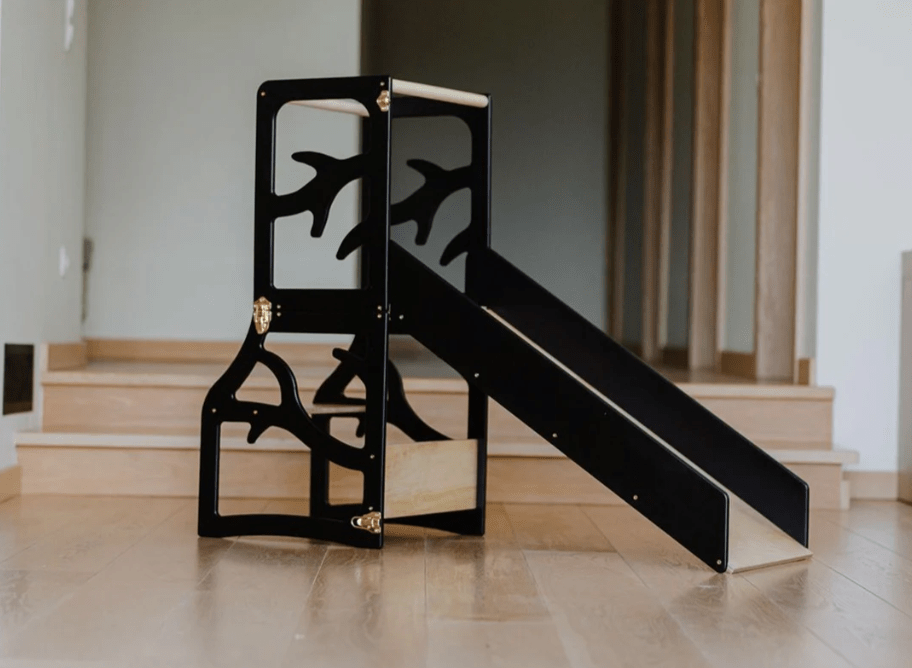
Just because a toddler tower is functional, doesn’t mean it has to be an eyesore in your home. This forest-themed convertible tower comes in black, white, grey, and natural wood colour, with optional stool and slide, and is sure to be a statement piece in the chicest of toddler kitchens!
Pros – beautiful, range of colours, converts into table, add-ons available
Cons – doesn’t fold, not adjustable for different ages, quite pricy
Cheap and Easy DIY Toddler Tower
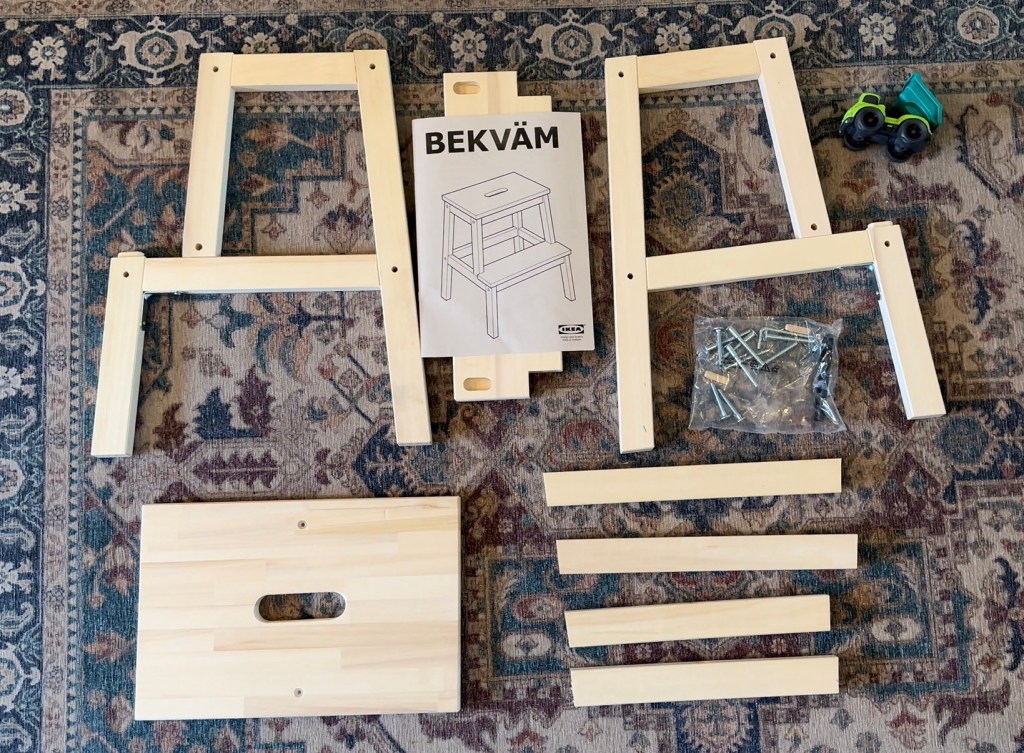
One thing you’ll notice from all the towers that you can buy, even the supposedly budget-friendly ones, is that they’re all pretty pricey. And believe me, I know that not every parent can splash the cash around like it’s thier baby’s bathwater. But that doesn’t mean that your kid should go without the benefits of a toddler tower. So here’s our hack for using affordable flat-pack IKEA furniture to build your own safe and sturdy toddler tower.

In brief, it involves the Bekvam step stool and the Oddvar side table, assembled with some slight modifications, and screwed together.
Pros – The cheapest toddler tower solution, easy to build, sturdy, simple
Cons – Can’t adjust to different toddler heights, doesn’t fold
Detailed written instructions with pictures are included below. For video instructions, check out the video at the top of this post, which you can also find and favourite on Instagram or Tiktok.
Materials
- IKEA Bekvam Step Stool, currently priced £19 (2025)
- IKEA Oddvar Side Table £12 (2025)
- 8 x 30mm-long wood screws
- Drill with 2mm-wide drill bit
- Screwdriver


Assembly Instructions
1. Start to assemble the Bekvam stool.

Follow the IKEA instructions to fix the two side pieces together and fix the first step in place.
But do not fix the top step in place.
Set the half-constructed stool aside for later.
2. Start to assemble the Oddvar table.

Follow the IKEA instructions to fix the two side pieces together using the top and middle crossbars.
Do not attach the lower crossbar on one side
And do not fix the tabletop in place.
3. Turn the assembled ‘legs’ upside down and put the tabletop on the feet.
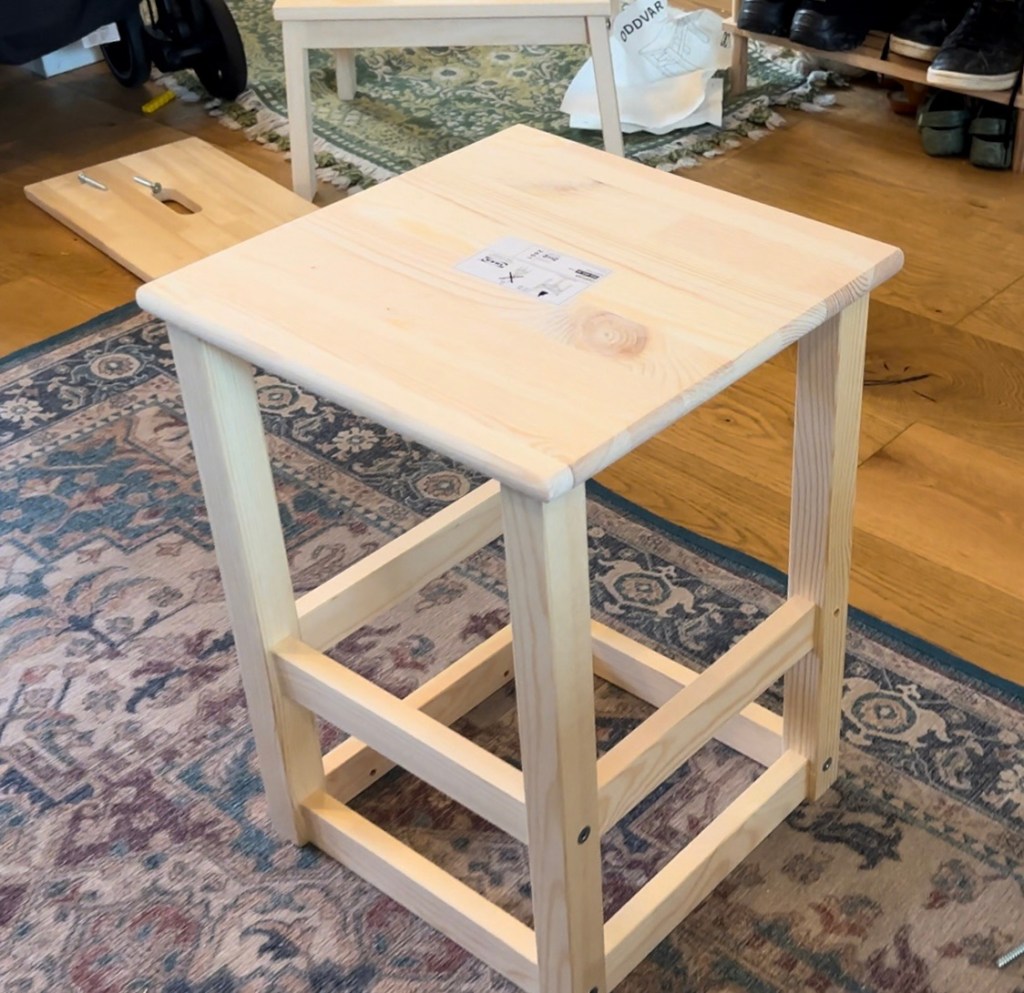
The framework of crossbars should be near the floor when you do this. The tabletop should sit squarely over the four legs.
4. Drill 4 pilot holes.

Use a drill with a skinny 2mm-wide drill bit to drill straight down through the tabletop and into the legs at each of the four corners.
Hold the tabletop down firmly while you do this to stop it moving relative to the legs.
Make sure your holes go deep enough to go through the wood and into the table legs.
(This step isn’t completely necessary, but will help to ensure that the wood doesn’t split when you insert the screws in the next step)
5. Fix the tabletop in place.
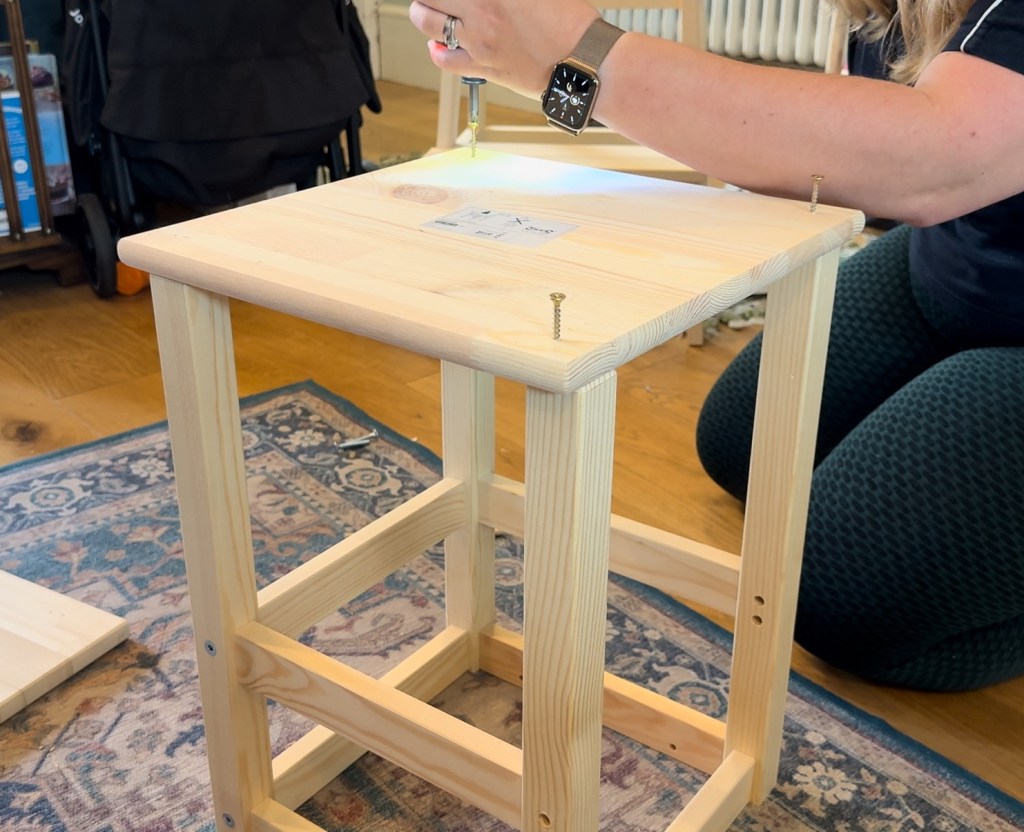
Use 30mm-long wood screws that will be long enough to go through the tabletop and into the legs.
Follow the pilot holes you drilled in the last step.
A power screwdriver will make this step easier.
When this step is complete, you now have the frame that will surround your toddler at the top of the tower.
6. Place the top step of the Bekvam stool on top of the tabletop.

The two pieces of wood are different sizes, so make sure that the edge of the Bekvam top step lines up with the edge of the tabletop on the side that is missing the crossbar.
The Bekvam top step should be placed top-down, so you should be able to see the cam holes when you are lining everything up.
7. Drill 4 pilot holes.
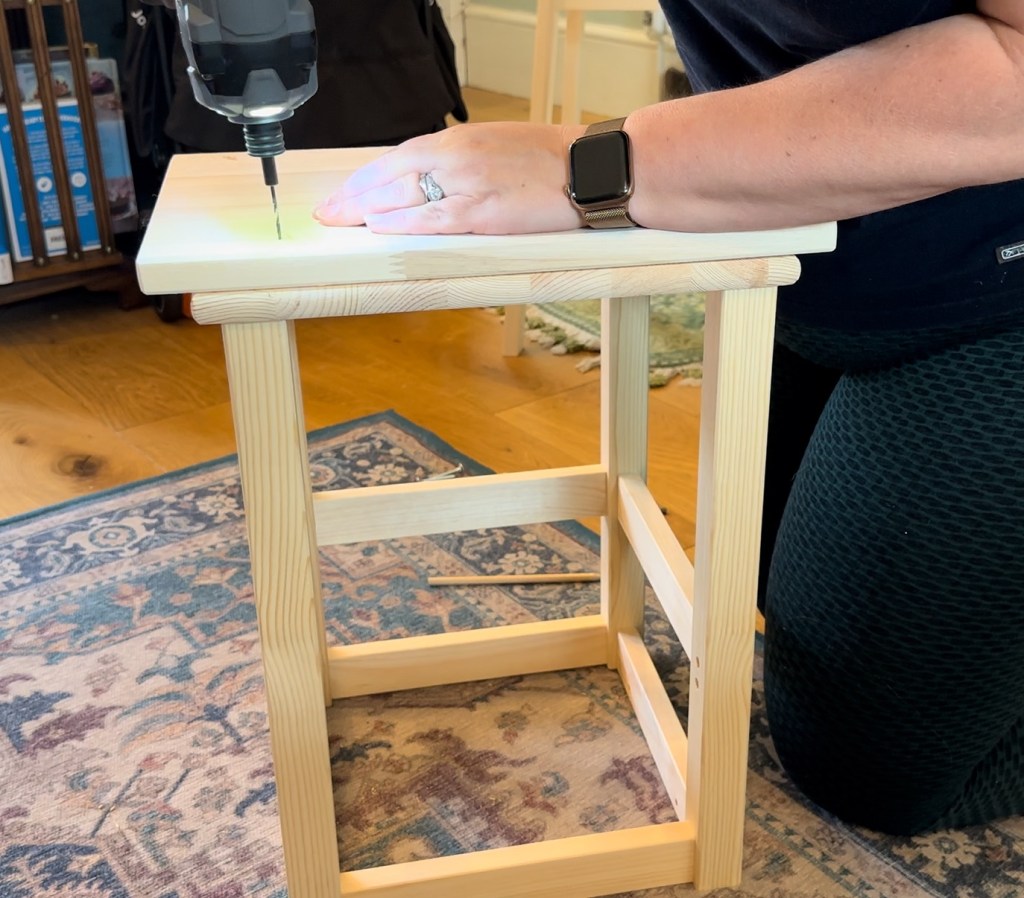
Press down on the two pieces of wood to stop them moving relative to one another while drilling the holes. Alternatively you can clamp them together.
Use a drill with a skinny 2mm-wide drill bit to drill straight down through the top step and into the tabletop. You don’t need to go all the way through the tabletop.
Aim to place the pilot holes near the four corners of the top step, but be careful not to drill into the screws that attach the tabletop to the legs.
8. Fix the stool top to the tabletop.
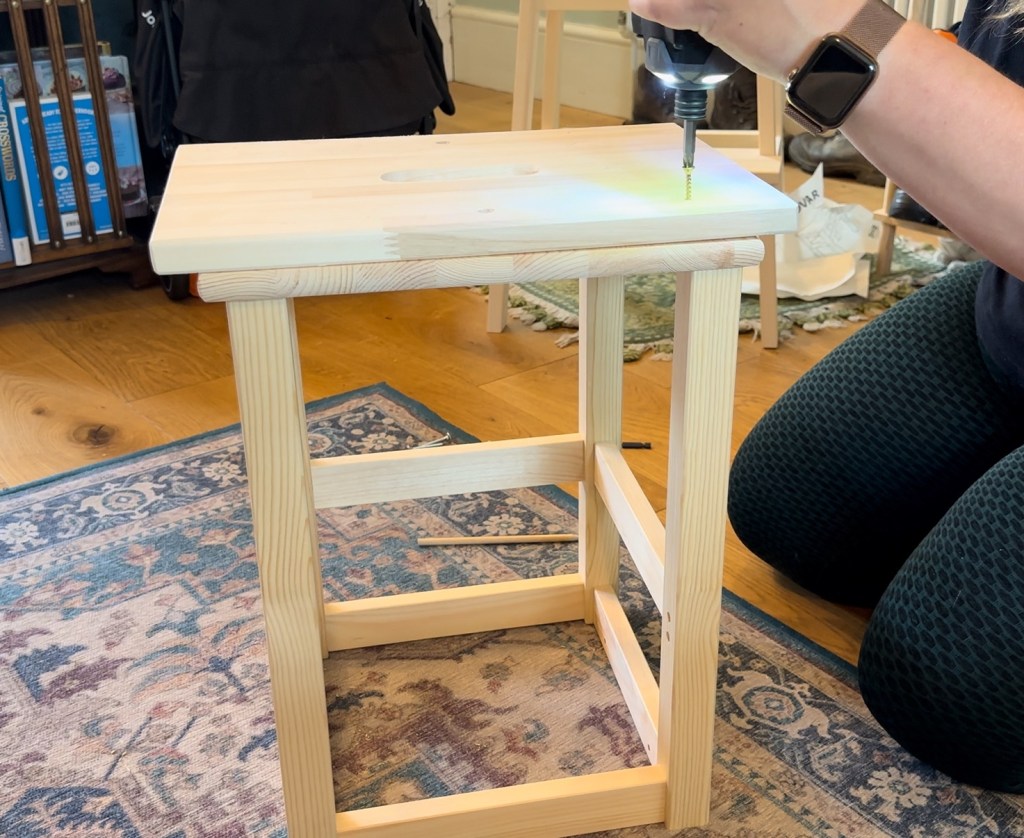
Keep the clamp in place, or confirm the alignment of the pilot holes before inserting the screws.
A power screwdriver will make this step easier.
Using 30mm screws will make sure the top step and tabletop are fixed together, but without having a sharp screw protruding through the tabletop.
9. Finish assembling the stool.

Pick up where you left off with the IKEA Bekvam assembly instructions, using the cams to attach the top step (with its new addition) to the rest of the stool you made in step 1.
It’s easiest if you turn the stool upside down, rather than the rest of the tower.
10. Turn the right way up and admire your handiwork.
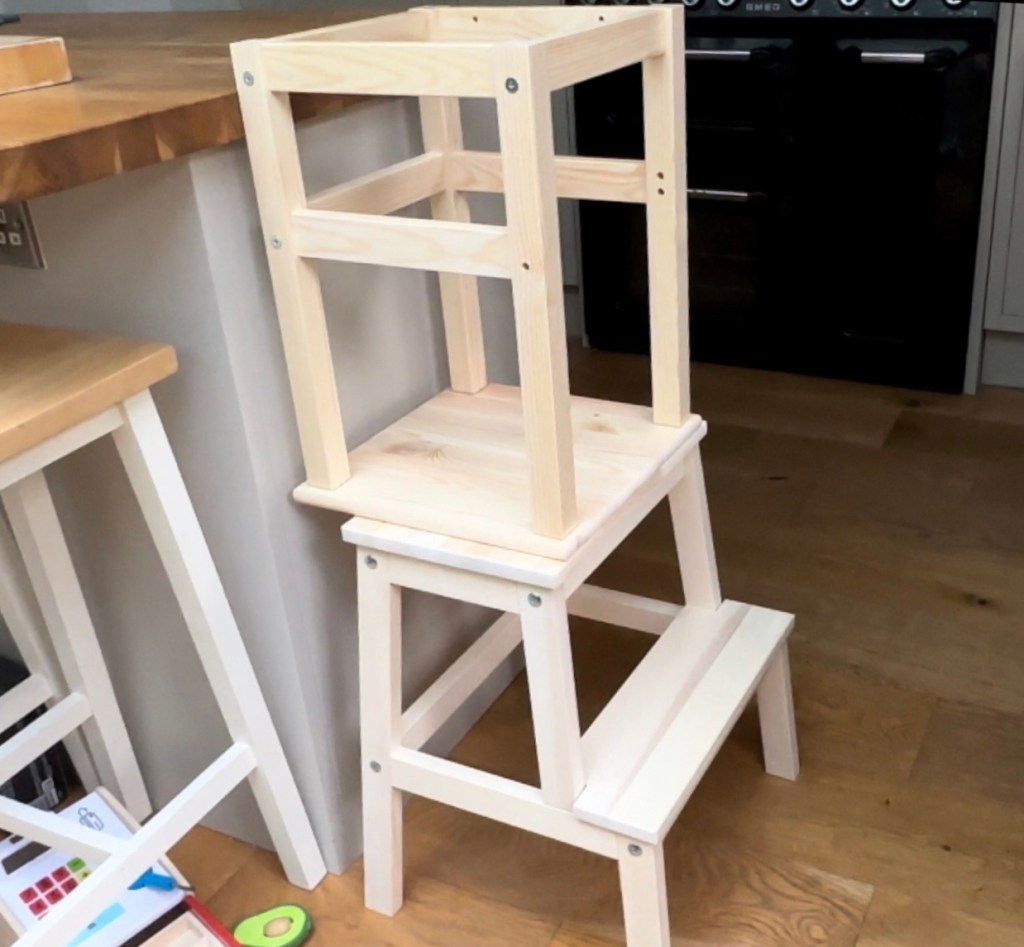
Once everything is fixed in place, your toddler tower is complete, but it’s upside down! Flip it over, add any finishing touches (see below) and enjoy!
Finishing Touches
The instructions above will help you build your own, sturdy toddler tower for far cheaper than you can buy elswhere. Once everything is screwed together tightly, your job is done, but there are a few finishing touches that you might like to consider, if you’re feeling fancy or want to go the extra mile.
- Add felt pads to the tower feet. If you don’t like the sound of wood scraping across your kitchen floor, then these are a must! Furniture feet like these are cheap, easy to apply, and will improve your quality of life when your toddler learns they can push the tower around!
- Paint or varnish your tower. This is one thing I really regret not doing. Both the Bekvam and Oddvar are raw, unfinished wood, which have a lovely scandinavian feel, but also absorb every bit of grease, juice, yoghurt and jam that is inevitably dropped onto them.
- Add ons for extra stability. We actually introduced our toddler tower as soon as Science Baby could stand and cruise, and before he could walk unassisted or climb up by himself. So for the first few months, we actually put back that missed cross-bar, for added safety if he toppled backwards. It was easy enough to fix and remove again, using just the Allan key and screws that came with the table. Now, nearly a year on, we have a string bean toddler who likes to throw his weight around, so we have added an extra bar of wood along the bottom for more side-to-side stability.
I really hope that this hack for a DIY IKEA toddler tower is useful, and if you end up making it for your little ones, I’d love to see your pictures and hear your feedback!


Leave a comment